

Yes, I am a PIRATE...200 years too late...
Wednesday, April 13, 2011
Burlap....It's What's for Craftin'!
Another Boop/Bossman contribution to my crafting...BURLAP! I saw this idea on Copy Cat Crafts and wanted to try it with my own LKD spin. I decided to do a basic stencil as opposed to the lettering. Newsflash to everybody: BURLAP IS A BEAST! It ravels and sheds little hairs while your're working with it, but the final product was pretty cool!

The Easter Tree
My Aunt Boop gave me a bag o eggs and suggested that I get on with making an Easter Tree. I had one of these when I was younger, so I decided to take her up on it and get a tree together. Here's the long and the short of it.


You will need:
Small tree branch (Free!)
White Spray Paint (on hand)
Flower pot/vase/container ($1)
Floral Foam ($1)
Spanish Moss ($1)
Eggs (Free from Boop!)
Ribbon (on hand)
Hot Glue Gun (on hand)

First, I spray painted the branch. It's verrrrrrry important to make sure you have sprayed the entire surface evenly! While I was waiting on it to dry, I fitted the floral foam in the vase. I decided to turn it upside down to fully support the branch that I had chosen. I cut it down to fit, then added the branch.


I double checked for any brown spots showing through, did a few touch up sprays, and then started working on my egg ornaments!
I had some ribbon on hand and lucky for me, the eggs already had holes in them! I looped the ribbon, threaded it through the hole on top, and added a few drops of hot glue to hold it in place.


Next, I added Spanish moss to cover up the foam, and then started to decorate! Here is the final product. Betty would say "too much" on the ornaments....but I like it loaded down :)

Wednesday, January 12, 2011
Crafty McCrafterson....Strikes Again!
The craft monster strikes again. If anything refreshing came from the "snow days" it's my time to actually do some crafting! I have wanted to do this project for sometime after seeing something similar in a magazine. I wanted to make a valance for my guest bedroom (AKA Cold Storage) that had some pizazz. I decided on this IKEA fabric. I had already used the white background version as a wall hanging in my "getting ready room" apparently if you don't have kids and you have three bedrooms....you can have a "getting ready room"...so be jealous. So here are the steps of my make it up as I go valance.
First, I ironed the fabric and laid it out on my living room floor to cut.

I cut around the edge of the pattern, leaving about 1/2 inch extra to fold under later.

I snipped at the point of each curve to allow ease in folding later.

This is the finished clipped and snipped product.

I finger pressed the edges under until the white edge was all that showed.

Then I for real pressed the edge down. Some of the black did show....but I'm not perfect...surprise, I know....and did I mention I'm making most of this up as I go along? The "inspiration" piece was completely geometric-with straight lines!

Now onto the sewing! Here is my new machine Santa brought me! I love it!

I sewed the folded "hem" down.

Turned and stitched edges.

Next, I folded the top edge down and pressed. This is where I really went off on making up my own plan...

I got these clippy things at IKEA.

Clippy Thing Close-up!

The window in question. Now the problem lies in that I already have these sheers up. IKEA does offer a "double" curtain rod situation...I only need to buy another rod and new brackets...but until I can get back down there I had to improvise...slightly.

Sooooooooooooo I took the sheers down and put one panel on top of the other one. I clipped the clips on to hold them in place.

I positioned the new valance over the sheers, centering it and overlapping the pressed top edge to envelop the two layers of sheers.

Then I replaced the clips.

I still have some work to do readjusting the sheers, but I think it turned out pretty well!

:)
Tuesday, January 11, 2011
Crafty McCrafterson.....Snow Day Happenings
A lot of people have told me I should have a craft blog. Since I have enough trouble keeping up one blog....I'll post one of my crafts and see what happens. So here goes....the first post of Crafty McCrafterson.
I have been wanting to add some stuff to my kitchen, but I've been at a standstill for both time and ideas. I have been on the fence with some of the signs that you can get at Hobby Lobby and places of the such...the ones that say "Eat" or "Family" or "Kitchen". I just felt like they were a little overdone....but I still wanted....something. I had found two possibilities on Copycat Crafts, one of my new favorite craft blogs, but I was still holding out. The EAT sign was a front runner as was Eat and Be Merry sign. I finally decided on something fitting for the kitchen...but a lot more personal and meaningful for me. Since I live in my grandparents' house, I thought of something my Papaw used to say before every meal..."You got to eat to live". It's true, it goes well in a kitchen, and it reminds me of my Papaw! WINNER! So here is how I did it. First I gathered my crafty things. I had just bought some scrapbook stuff from Mighty Dollar in Thomasville. If you are crafty and you haven't been here...you are missing out. They carry a load of scrapbook stuff all the same brands that you would pay $$$ for at Michael's or Hobby Lobby and it's all $1! This also made a great excuse to bust out the frames I bought at Wal-Mart on Black Friday.
Here are some of the supplies:


Using the frame as a guide, I checked to see if my letters were centered, since I used the glue stick, I could easily slide letters around on the paper to readjust.

I used a small piece of tape to hold the paper to the glass.


Final products!

It took a little placement and trial and error, but here is the final product on the wall! I used my level and measuring tape thank you very much!


I have been wanting to add some stuff to my kitchen, but I've been at a standstill for both time and ideas. I have been on the fence with some of the signs that you can get at Hobby Lobby and places of the such...the ones that say "Eat" or "Family" or "Kitchen". I just felt like they were a little overdone....but I still wanted....something. I had found two possibilities on Copycat Crafts, one of my new favorite craft blogs, but I was still holding out. The EAT sign was a front runner as was Eat and Be Merry sign. I finally decided on something fitting for the kitchen...but a lot more personal and meaningful for me. Since I live in my grandparents' house, I thought of something my Papaw used to say before every meal..."You got to eat to live". It's true, it goes well in a kitchen, and it reminds me of my Papaw! WINNER! So here is how I did it. First I gathered my crafty things. I had just bought some scrapbook stuff from Mighty Dollar in Thomasville. If you are crafty and you haven't been here...you are missing out. They carry a load of scrapbook stuff all the same brands that you would pay $$$ for at Michael's or Hobby Lobby and it's all $1! This also made a great excuse to bust out the frames I bought at Wal-Mart on Black Friday.
Here are some of the supplies:

Letters and Background Papers via the Mighty Dollar

Coke Zero always a crafting essential (also note my chipping nail polish...so classy)

Black Friday Frames...I got all of these for like $7!
Now on to the actual craft.....
First I found my letters and positioned them on the counter. Since there were several variations of each letter, I tried a few combinations before I had my words together.

As you can see above, each letter had jagged edges....now it would have been super cool if they were like this all the way around..but they weren't so in comes the paper cutter. I trimmed all of the edges down.

Next, I glued the pieces in place with a glue stick.

Using the frame as a guide, I checked to see if my letters were centered, since I used the glue stick, I could easily slide letters around on the paper to readjust.


Since I'm hanging these on the wall, I don't need the easel attachment. I plan on these staying on the wall for quite some time and they get in the way, so I just ripped them off. :)

Everybody needs a brown dog :)


It took a little placement and trial and error, but here is the final product on the wall! I used my level and measuring tape thank you very much!


Yay! :)
Tuesday, November 30, 2010
CHRISTMAS CARD TIMEEEEEEE!
Wow! I can't believe it's already time to pick out Christmas cards again! Last year I was in a mess trying to decide on a card! It was the first year I was being a grown up and sending out my own Christmas cards. Of course, I had to come up with a hilarious theme and convince my mom to take the picture for the card. The best part was that she thought she was only coming over to take just one picture...she didn't quite realize I had a photo shoot planned. I think I already have some options in line for this year...but Max needs a haircut before we make any moves! Ahhhh! It's practically December and definitely time to get a move on this Christmas card deal! Decision making is not one of my strongest qualities and this year Shutterfly is not making it easy to pick just one card! They have a huge selection of super cute and fun cards for any and everyone....So don't be surprised if you get three or four different cards with my mug on them! I am loving the color scheme of red and light blue as well as the modern twist on vintage that I have seen. Here are some of my favorites:
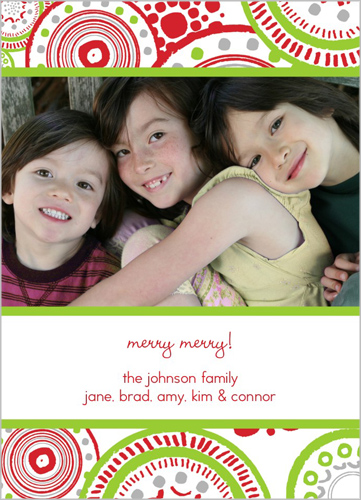

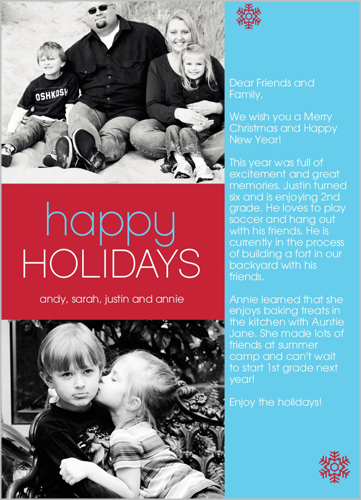
I love how the type on this one overlaps the picture...really making the picture the focal point...and everyone knows I love being the focal point!
I love the circles! It reminds me of some fabric I have!
I'm feeling this "series of pictures" thing...with the captions...I could really, really, really have fun with this!
I could do a lot of damage with this letter space on the side! Think of all the fun things I could write....
Well I still have some decision making to do...but check out these cards and other fun products too! I am really into the photo books...such a great idea for the pictures from my travels that are currently trapped in a memory card somewhere!
Wednesday, November 24, 2010
OMG how is it the end of November?
When you have a superbloggy school neighbor, there is some pressure to get your life together! I can't believe that it's basically Thanksgiving and closing in on the end of the semester! I have been super busy with school, grad school, and L-I-V-I-N! Gahhhhhhhhhhhhhhhh! I have been working on. my Christmas Decor as well as crafts! I plan on posting some of my craftyness in the near future :).
Saturday, August 21, 2010
And so it begins....
So this was our first week back at the schoolhouse. Luckily, we had a faculty meeting coupled with a breakfast to kickoff the school year. The faculty meeting was like 1,000 hours long, as expected, but was peppered with hilarities, also as expected. Here are some of the musings I recorded.
1) During the prayer at breakfast: "...touch someone in a special way..."
2) "Ms. Darr will have an intern...so she will have someone working under her..." WOW.
3) Delishhhhhhhhhhh hmmmmmmmmmmm :) That's just for the Neighbor and I :):):):) Yummm-O
4) 8:40...our other Neighbor shows up....
5) In a story Papa Fish told he kept referring to these people that lived in a village as "The Village People". So needless to say all I could think of was the all male singing group. So here were a few Village People quotes:
-The Village people were upset.
- There was no oral....talking.
- The Village people were told to pick their best, most experienced man. LMAO.
6) "Communication skills...they is so hard."
Wow. I love where I work...because it keeps me chucklin'.
Subscribe to:
Posts (Atom)